

Install Home Cold Plunge Without Plumbing: Step-by-Step
Table of Contents
- How to Install Home Cold Plunge Without Plumbing: What You'll Need
- Choosing the Right Tub or Container
- DIY Cold Plunge Setup: Filling Without a Water Line
- Cold Plunge Chiller for Bathtub: Temperature Control Without Plumbing
- Drainage Solutions for Indoor Cold Plunge Setup
- Cold Plunge Maintenance Without Plumbing
- Safety and Environmental Considerations
- Common Mistakes to Avoid
Install Home Cold Plunge Without Plumbing: Step-by-Step
Last Updated: July 25, 2026
Learning how to install home cold plunge without plumbing has become essential for homeowners seeking recovery benefits without major renovations. At Prime Recovery Den, we've worked with hundreds of clients adding cold plunge therapy to their homes without the expense and complexity of dedicated water lines. The good news: you don't need a plumber or permanent modifications to enjoy therapeutic cold water immersion.
This guide walks you through every step of setting up a functional cold plunge system using portable solutions, manual filling methods, and practical drainage approaches.
How to Install Home Cold Plunge Without Plumbing: What You'll Need
Essential Components and Tools
Your cold plunge system requires a container or tub, a chiller unit or ice supply method, hoses for water circulation, a drain valve, and electrical infrastructure for power. Start with a submersion container, either a dedicated cold plunge tub or a stock tank. Acquire inlet and outlet hoses sized appropriately for your tub's dimensions, typically ¾-inch or 1-inch diameter. A drain valve rated for your tub's water capacity ensures controlled drainage. If using a chiller unit, you'll need a submersible pump to circulate water.
For electrical setup, ensure you have a GFCI outlet within safe distance of your installation. GFCI protection prevents electrical hazards when water and electricity are in proximity. A basic toolkit should include adjustable wrenches, hose clamps, plumber's tape for connections, and a level to ensure your tub sits evenly.
Space and Structural Considerations
Your installation location must support the weight and accommodate moisture. A filled cold plunge tub weighs between 800 and 2,000 pounds depending on size. Concrete floors, reinforced basements, or ground-level spaces distribute this weight safely. Upper floors require structural assessment; consult a contractor if unsure about load-bearing capacity.
Moisture management is equally critical. Cold water creates condensation around the tub, potentially damaging walls, flooring, and nearby structures. Install moisture barriers, waterproof membranes, or sealed flooring beneath and around your tub. Ensure adequate ventilation to manage humidity levels. A dehumidifier in enclosed spaces prevents mold growth and protects your home's structural integrity.
Choosing the Right Tub or Container
Your container choice determines durability, aesthetics, and installation complexity.
Stock Tank vs. Dedicated Cold Plunge Tubs
Stock tanks, agricultural water containers made from galvanized steel or polyethylene, cost significantly less than purpose-built cold plunge tubs. A 100-gallon galvanized stock tank typically costs a fraction of dedicated systems. Stock tanks offer practical functionality but lack the refined finish and integrated features of dedicated systems.
Dedicated cold plunge tubs from manufacturers like those at Prime Recovery Den feature ergonomic seating, integrated drainage systems, insulation, and finishes that complement sophisticated home interiors. These tubs are engineered for temperature control and water circulation, reducing maintenance complexity. If your home emphasizes intentional design and refined aesthetics, a purpose-built system delivers the sophisticated atmosphere that transforms a functional recovery tool into a genuine sanctuary.
Portable Cold Plunge Solutions
Portable cold plunge systems offer flexibility for renters, those with limited space, or homeowners uncertain about permanent installation. These collapsible or modular tubs set up quickly, drain easily, and store away when not in use. Portable models typically hold 100-200 gallons and cost less than fixed installations. They work with standard hose connections and don't require structural modifications. The trade-off: smaller capacity means less water volume for full-body submersion, and setup requires more frequent manual labor.
DIY Cold Plunge Setup: Filling Without a Water Line
Filling your tub without dedicated plumbing requires planning and patience.
Manual Filling Methods
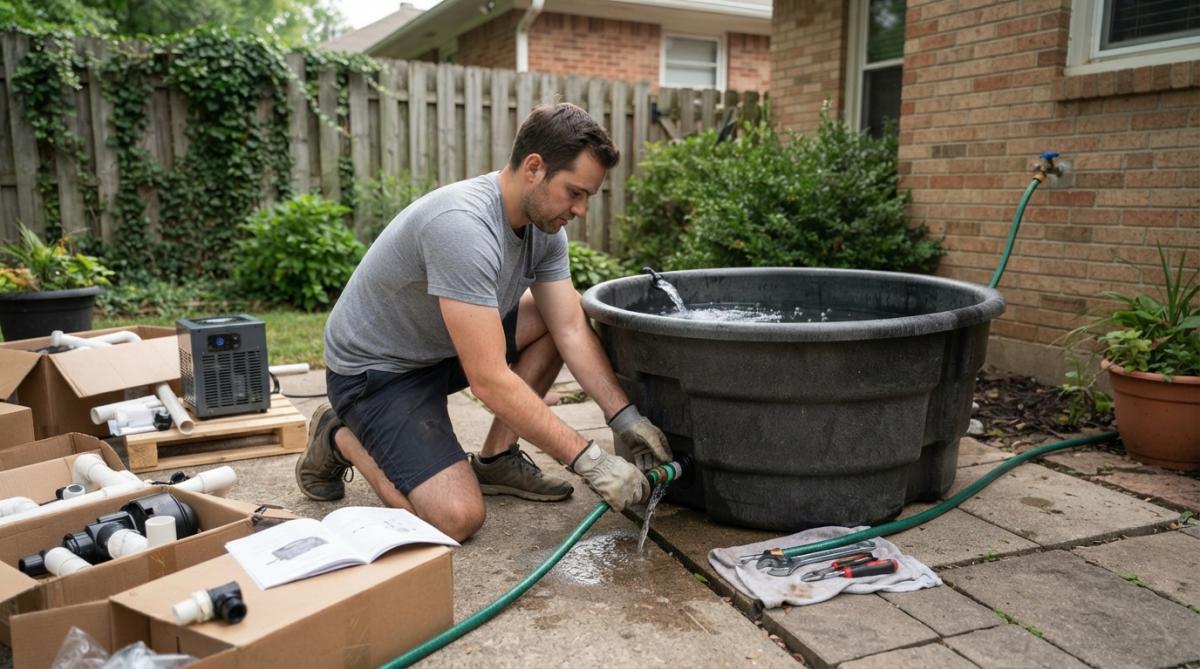
The simplest approach uses your home's existing tap water supply. Connect a standard garden hose to your kitchen, bathroom, or outdoor faucet and position it into your tub. Filling a 200-gallon tub this way takes 30-45 minutes depending on water pressure. For homes with low water pressure, use a submersible pump to transfer water from an alternative source like a well or rainwater collection system.
Using Hose Adapters and Inlet Connections
Hose adapters connect your standard garden hose to your tub's inlet port using universal threaded connections. Wrap plumber's tape around male threads before connecting to prevent leaks. Hand-tighten the connection, then use an adjustable wrench for a final quarter-turn; over-tightening damages threads and causes leaks.
For tubs without pre-installed inlet ports, purchase an inlet kit designed for your specific tub model. Installation involves cutting a small hole in the tub wall and securing the port with provided fasteners. Ensure the inlet sits above your maximum water level to prevent siphoning.
Cold Plunge Chiller for Bathtub: Temperature Control Without Plumbing
Achieving therapeutic cold temperatures requires either a dedicated chiller unit or consistent ice supply.
Chiller Unit Installation and Operation
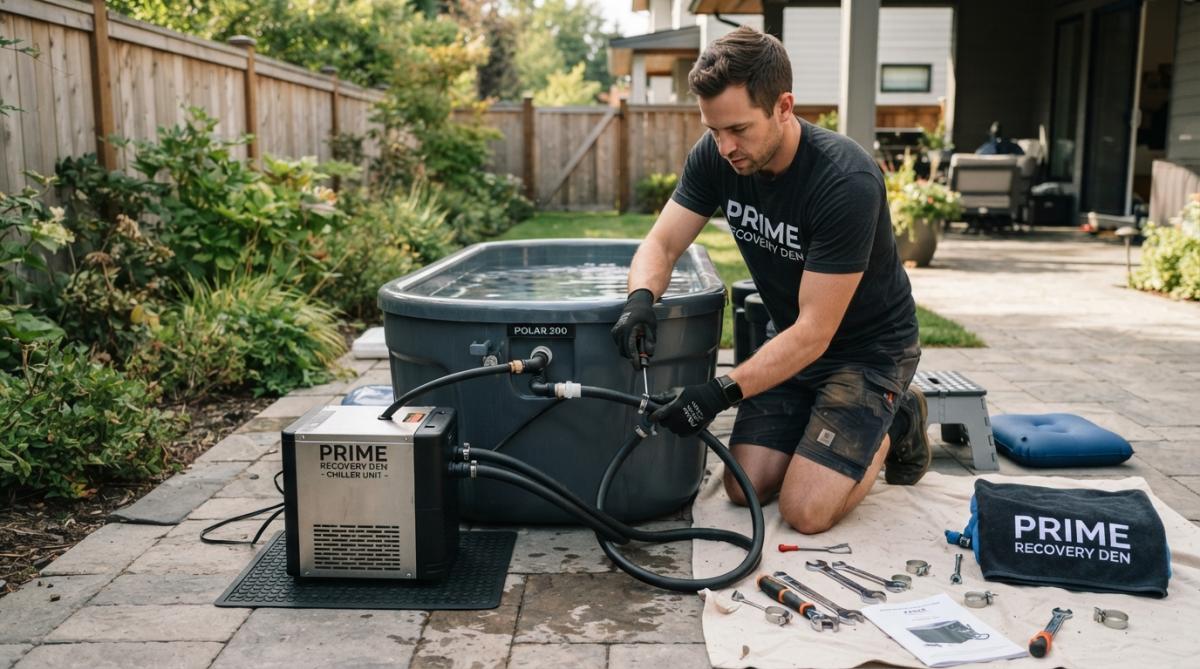
A cold plunge chiller unit maintains target water temperature automatically using refrigeration technology. Installation involves placing the chiller unit near your tub, connecting inlet and outlet hoses, plugging it into a GFCI outlet, and turning it on. The chiller pulls water from your tub, cools it to your set temperature (typically 35-60 degrees Fahrenheit), and returns it. Most units reach target temperature within 2-4 hours depending on starting water temperature and ambient conditions.
Chillers require electricity and produce heat as a byproduct; ensure adequate ventilation around the unit. They also need periodic maintenance: cleaning inlet filters and checking hose connections monthly prevents performance degradation. Properly maintained chillers last 5-7 years with consistent use.
Ice-Only Methods vs. Chiller Units
Ice-only cooling uses bags of ice added directly to your tub to lower temperature. This method requires no electricity and minimal setup. The drawback: ice melts continuously, requiring frequent additions to maintain target temperature. A 200-gallon tub might need 40-60 pounds of ice initially, then 20-30 pounds daily to maintain 50-degree water.
Ice costs accumulate significantly over time. Additionally, melting ice dilutes your water with freshwater, gradually reducing salt concentration if you're using saltwater systems for therapeutic benefits. For consistent daily use, a chiller unit delivers better value and convenience. For occasional use, ice-only methods work adequately.
Drainage Solutions for Indoor Cold Plunge Setup
Draining your tub safely prevents water damage and maintains your home's structural integrity.
Drain Valve and Gravity Drain Systems
A drain valve installed at your tub's lowest point allows controlled water release. Most drain valves use a ball valve or gate valve mechanism; turn the handle to open or close water flow. Connect your outlet hose to the valve's threaded port, then direct the hose to a floor drain, sump pump, or exterior location.
Gravity drain systems use elevation difference to move water without pumping. If your tub sits above a basement floor drain or lower exterior area, water flows naturally when you open the valve. For tubs positioned above ground level with no natural drain, use a submersible pump in a collection basin beneath the tub.
Preventing Leaks and Floor Damage
Install your tub on a waterproof, sloped floor that directs any spilled water toward a drain. Vinyl flooring, sealed concrete, or specialized drainage mats work well. Check all hose connections monthly for drips or seeping. Replace hoses every 2-3 years; UV exposure and water pressure gradually degrade hose material, increasing leak risk.
Position your tub on a moisture barrier beneath the entire footprint. This barrier prevents water from reaching structural elements if a slow leak develops. In basements, ensure your sump pump functions properly and your drain system handles the volume you're removing.
Cold Plunge Maintenance Without Plumbing
Regular maintenance keeps your system clean, safe, and functional.
Water Filtration and Sanitation
Cold water inhibits bacterial growth, but your tub still requires sanitation protocols. Change your water every 3-7 days depending on usage frequency. High-use systems need more frequent changes; light-use systems can extend water changes to weekly intervals.
Before refilling, clean your tub thoroughly. Drain completely, scrub the interior with a soft brush, rinse with fresh water, and dry before refilling. For chiller-equipped systems, install an inline water filter between your tub and chiller. Replace filters monthly or when water flow decreases noticeably.
Some users add salt to their cold plunge water for therapeutic benefits. Maintain concentration between 1-3% by weight. Test salt levels monthly using a hydrometer.
Water Changes and Hygiene Protocols
Establish a consistent schedule for water changes and maintenance. Document your routine in a simple log, noting the date of each water change and any observations about water clarity or temperature consistency.
Before each use, visually inspect your water. Clear, odor-free water indicates good sanitation. Cloudy water, algae growth, or unpleasant odors signal the need for immediate draining and cleaning. If sharing your cold plunge with family members or guests, establish hygiene rules: shower before immersion, avoid using if you have open wounds or active infections, and limit session duration to 5-10 minutes for beginners.
Safety and Environmental Considerations
Cold water immersion carries real risks. Proper safety practices protect your health and your home.
Electrical Safety and GFCI Outlets
GFCI (Ground Fault Circuit Interrupter) outlets are non-negotiable for any electrical equipment near water. A GFCI outlet detects electrical faults and cuts power instantly, preventing electrocution. Install a dedicated GFCI outlet within 6 feet of your cold plunge tub; never use a standard outlet for chiller units or pumps.
Have a licensed electrician install your GFCI outlet if unfamiliar with electrical work. Test your GFCI monthly by pressing the test button; power should cut immediately. Keep all electrical cords away from water sources and use cord covers or conduits to protect cables from moisture and damage.
Condensation, Moisture Barriers, and Humidity Management
Cold water creates visible condensation on your tub's exterior and surrounding surfaces. Install a moisture barrier, waterproof membrane, vinyl sheeting, or sealed flooring, beneath and extending 3-4 feet around your tub. For wall protection, apply waterproof paint or install moisture-resistant drywall in the immediate vicinity.
Ventilation is critical. Use a dehumidifier in enclosed spaces, or install a small exhaust fan to move humid air outdoors. Run ventilation for 1-2 hours after each use to reduce ambient humidity. Monitor humidity levels with an inexpensive hygrometer; maintain levels below 60% to prevent mold growth.
Floor Load-Bearing Capacity and Noise Mitigation
A 200-gallon tub filled with water weighs approximately 1,700 pounds. Upper floors typically support 40 pounds per square foot; your tub concentrates weight in a small footprint, potentially exceeding safe limits. Consult a structural engineer if installing on an upper floor. Ground-level installations distribute weight more safely.
Chiller units produce noise, typically 60-70 decibels, comparable to normal conversation. If noise bothers you, position the chiller away from living spaces or install acoustic barriers around it.
Common Mistakes to Avoid
Many homeowners underestimate moisture damage. They install a tub on standard flooring without moisture barriers, then discover water damage months later. Install protection before your first fill.
Inadequate drainage planning creates another common problem. Owners fill their tubs, then discover they have no practical way to drain them. Plan your drainage route before purchasing your tub.
Choosing the wrong tub size leads to regret. A 100-gallon tub feels cramped for full-body immersion; a 300-gallon tub requires excessive ice or chiller runtime. Most users find 150-200 gallons provides comfortable submersion without excessive maintenance.
Skipping GFCI electrical protection is dangerous. Never compromise on this safety measure.
Finally, inconsistent maintenance degrades water quality quickly. Establish a maintenance routine from day one and stick to it.
Ready to transform your home into a sophisticated recovery sanctuary? Prime Recovery Den offers premium cold plunge systems engineered for durability, temperature precision, and seamless integration into refined home environments. Our tubs feature integrated drainage, ergonomic design, and finishes that complement any aesthetic. Explore our collection and discover how intentional recovery design elevates your daily wellness practice.
| Setup Method | Water Capacity | Temperature Control | Installation Time | Best For |
|---|---|---|---|---|
| Stock Tank + Ice | 100-150 gallons | Manual ice additions | 1-2 hours | Budget-conscious, occasional use |
| Portable Tub + Chiller | 150-200 gallons | Automatic chiller | 2-3 hours | Flexibility, consistent temperature |
| Dedicated Cold Plunge | 150-250 gallons | Integrated chiller | 3-4 hours | Permanent installation, premium aesthetics |
| DIY Barrel Setup | 50-100 gallons | Ice-only | 1 hour | Minimal space, experimental use |
Frequently Asked Questions
Can you install a home cold plunge without plumbing modifications?
Yes. A cold plunge without dedicated plumbing uses manual filling via standard tap connections, hose adapters, and gravity or manual drainage. This approach requires no permanent plumbing work, making it ideal for renters or homeowners avoiding renovation costs. You'll need a suitable tub, hose connections, and a drain valve to manage water removal safely.
What's the best portable cold plunge solution for indoor spaces?
Portable cold plunge solutions include stock tanks, dedicated fiberglass tubs, and inflatable models. Stock tanks offer affordability and durability; fiberglass tubs provide insulation and aesthetic appeal; inflatable options maximize portability. Choose based on your space, budget, and recovery goals. Ensure your floor can support water weight (typically 8,000-10,000 pounds for a full tub) and plan for condensation management.
How do you maintain water quality in a cold plunge without plumbing?
Maintain cold plunge maintenance without plumbing by using water filtration systems, sanitizing agents (chlorine or salt-based), and regular water changes. Test water chemistry weekly using pH and chlorine test kits. Drain and refill every 2-4 weeks depending on usage frequency. A submersion-compatible filter or circulation pump helps extend water life and reduces sanitation demands between drains.
Do you need a dedicated electrical circuit for a cold plunge chiller?
Most cold plunge chillers require a dedicated 240V circuit for safe operation. Install a GFCI outlet to prevent electrical hazards near water. Check your chiller specifications for exact requirements. If you lack a dedicated circuit, hire a licensed electrician, never use extension cords or standard outlets. Proper electrical setup is critical for safety and prevents fire or shock risks in indoor installations.
This article was written using GrandRanker


Leave a comment
This site is protected by hCaptcha and the hCaptcha Privacy Policy and Terms of Service apply.