

How to Create a Tranquil Outdoor Retreat: 7-Step Guide
Table of Contents
- Step 1: Plan Your Outdoor Retreat Layout With Distinct Zones
- Step 2: Build Backyard Wellness Design Ideas Into the Plan
- Step 3: Choose the Best Outdoor Cold Plunge for Home Use
- Step 4: Layer Lighting, Water, and Sound for Calm
- Step 5: Add Privacy Screening, Seating, and Natural Materials
- Step 6: Luxury Sauna Installation Tips for a Seamless Build
- Step 7: Keep the Retreat Tranquil Year-Round
- Conclusion: Design the Retreat You'll Actually Use
- Frequently Asked Questions
Last Updated: September 24, 2026
Step 1: Plan Your Outdoor Retreat Layout With Distinct Zones
Learning how to create a tranquil outdoor retreat starts with the layout, not the shopping list. A tranquil outdoor retreat is a deliberately zoned space where each area serves one purpose: rest, warmth, gathering, or quiet.

Map the Space Before You Buy Anything
Walk the yard at three times of day and note where sun hits, where water pools, and where neighbors can see in. Mark the north side for shade-tolerant plantings, and measure gate widths and fence lines, a sauna kit arrives on a pallet, and a tight side yard becomes a real problem.

Step 2: Build Backyard Wellness Design Ideas Into the Plan
Strong backyard wellness design ideas follow a simple principle: contrast. Heat followed by cold, activity followed by stillness. Biophilic design research links natural materials and views of greenery to lower stress, which is why the best retreats lean on wood, stone, and living plants rather than synthetic surfaces.
Hot and Cold Contrast: Sauna and Plunge
Pairing a sauna with a cold plunge anchors most recovery-focused yards. Heat relaxes muscles and raises circulation; cold brings it back down. Placing them within a few steps of each other matters more than either unit's specs, because the transition is the point.
Quiet Corners for Reading, Tea, and Stillness
Every retreat needs one spot with no function beyond sitting still. A single ergonomic chair under a shade sail, facing a small water feature, does more for daily use than a larger lounge set nobody settles into.
Step 3: Choose the Best Outdoor Cold Plunge for Home Use
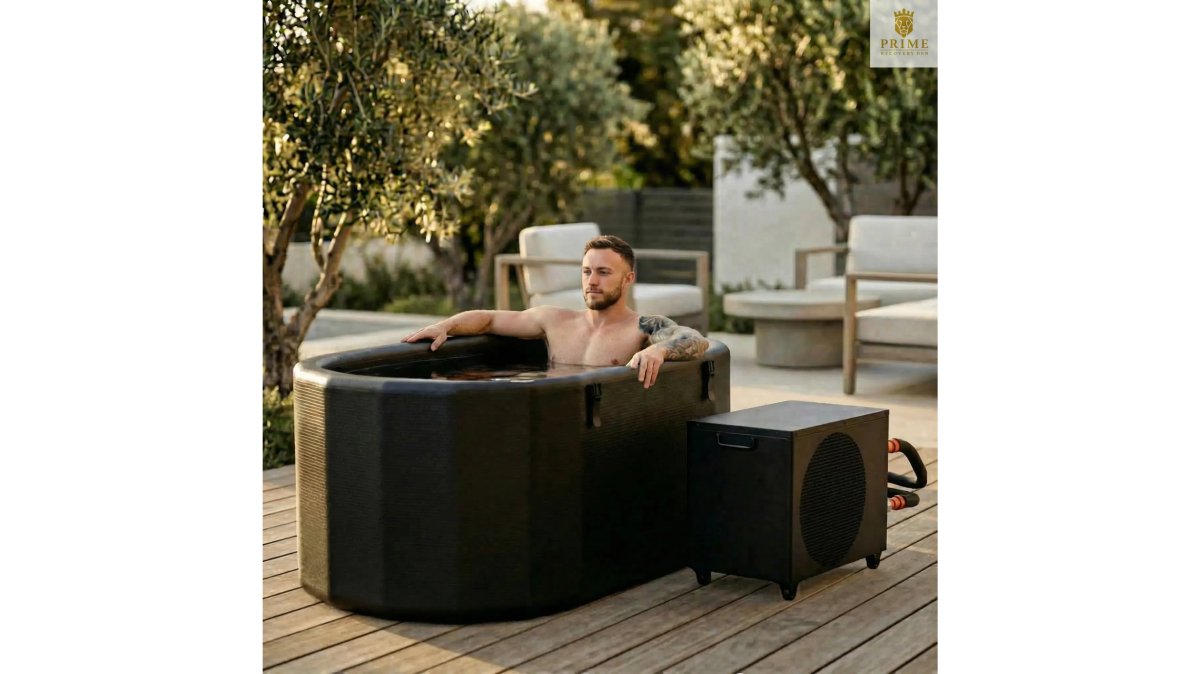
The best outdoor cold plunge for home use is sized to your body, your climate, and your willingness to maintain it. Cold water immersion means submerging in water held well below body temperature for a short, controlled period. Most home units fall into three categories:
| Plunge Type | Best For | Maintenance Load | Notes |
|---|---|---|---|
| Inflatable or soft-sided | Renters, small patios | Drain and refill regularly | Lowest upfront cost; insulation is minimal, so chillers work harder in heat |
| Hard-shell acrylic | Year-round outdoor use | Filtration plus sanitizer | Holds temperature better; foam or spray insulation keeps the chiller from running constantly |
| Built-in or tiled | Permanent installations | Full system upkeep | Requires a contractor, a dedicated drain, and a plan for freeze protection |
Sizing, Placement, and the Details That Decide Daily Use
Measure your seated shoulder width and the depth you can comfortably submerge to before you shop. A plunge that forces you to curl up or leaves your shoulders exposed will get used once. Most adults find a tub roughly 30 to 40 inches deep and long enough to sit with knees slightly bent is the sweet spot.
Why a Prime Recovery Den Plunge Changes Your Week
A plunge you actually use does more than check a recovery box. The first thirty seconds are a jolt; the next few minutes are a reset. Stepping out of a cold plunge can leave you feeling alert, clear-headed, and calm. That feeling is why a plunge belongs in a tranquil retreat, not a gym corner.
Step 4: Layer Lighting, Water, and Sound for Calm
Ambient lighting, moving water, and gentle sound separate a patio from a retreat. Layer them rather than relying on one element, a single overhead fixture flattens the space, while three layers create depth and calm.
Light in Three Layers
- Path and step lighting: low fixtures that mark walkways and prevent stumbles after dark
- Ambient lighting: string lights, lanterns, or dimmable LED built into the sauna or pergola
- Accent lighting: uplights aimed at a focal point such as a tree, water feature, or stone wall
Sound follows the same logic. A small recirculating water feature and well-placed wind chimes mask traffic noise without competing with conversation. Outdoor acoustics improve when you add softscaping, since dense plantings absorb reflected sound off hard surfaces.
Step 5: Add Privacy Screening, Seating, and Natural Materials
Privacy screening makes an outdoor room feel like a room. Without it, people self-consciously keep their voices down and use the space less. Options range from fast-growing native plantings to slatted wood panels and shade sails.
SaunaLife Model G3 Outdoor Home Sauna →
Step 6: Luxury Sauna Installation Tips for a Seamless Build
Luxury sauna installation tips come down to three things: site prep, power, and drainage. Get those right and the cabin goes together cleanly; get them wrong and you will be fixing them for years.
Site Prep: The Base Decides Everything
A sauna cabin is heavy and does not like movement. Plan a level, compacted base sized to the footprint plus a little margin. Gravel over compacted soil, a poured concrete pad, and a reinforced deck all work, but each changes the install timeline: gravel is fastest and drains well, concrete is most stable and slowest, and a deck needs framing rated for the cabin's loaded weight.
Power, Heater Sizing, and the Run You Forgot to Plan
The heater is usually ordered separately and matched to the cabin's volume, not its footprint. An undersized heater runs constantly and never reaches temperature; an oversized one cycles hard and feels harsh. Confirm voltage, amperage, and whether it needs a dedicated circuit before you trench anything, the run from your panel to the sauna is the step people forget, and the one that is expensive to redo.
A few practical notes for your project:
- Confirm the heater is ordered separately and matched to the cabin's volume
- Check gate and path access for pallet delivery before the truck arrives
- Decide on the base material early: gravel, concrete pad, or deck all change the install timeline
- Leave clearance for airflow around the structure and for the door to swing fully open
- Plan drainage so meltwater and rain move away from the base, not under it
Products That Make the Build Feel Considered
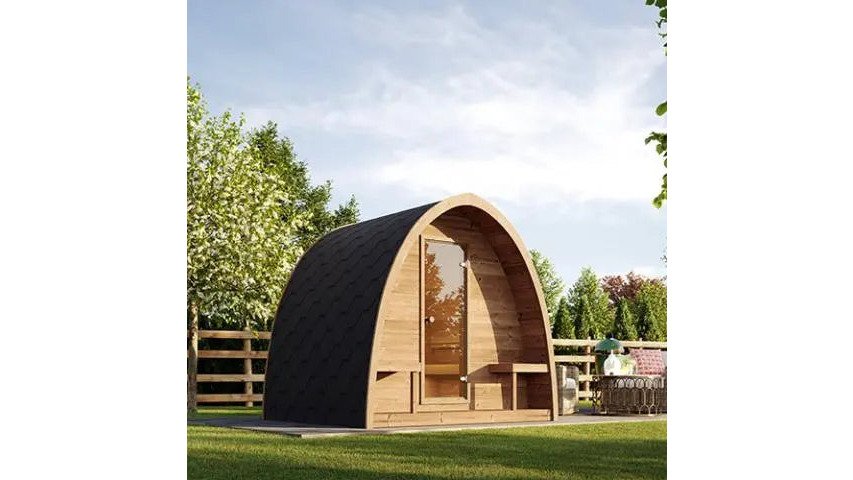
For a kit like the SaunaLife Model G3 Outdoor Home Sauna Kit, plan a level, compacted base sized to the footprint, confirm the electrical run meets the heater's requirements, and leave clearance for airflow. The G3's parabolic arched roof handles weather protection and interior heat circulation, and its knotless Thermo-Aspen benches and dimmable LED lighting with Wi-Fi app and remote control make the finished space feel considered rather than assembled.
Step 7: Keep the Retreat Tranquil Year-Round
A retreat that only works in July is not a retreat. Year-round comfort comes from a maintenance schedule and a few cold-weather adjustments.
| Season | Key Tasks | Frequency |
|---|---|---|
| Spring | Inspect wood surfaces, reseal if needed, clear drainage | Once |
| Summer | Check plunge chiller performance, trim plantings for airflow | Monthly |
| Fall | Clear gutters and roof debris, store cushions, drain hoses | Once |
| Winter | Keep paths clear, verify heater function, cover unused furniture | As needed |
Conclusion: Design the Retreat You'll Actually Use
The hardest part of building a tranquil outdoor retreat is not the budget or the build. It is resisting the urge to fill every square foot. A retreat works because it has room to breathe, and because the pieces in it were chosen for how they make you feel after a long week: warm, unhurried, and genuinely off the clock.
Frequently Asked Questions
What are the essential elements of a tranquil outdoor retreat?
Most calm outdoor spaces share five elements: a clear layout with separate zones, layered lighting, a water or sound feature, dense privacy screening, and comfortable seating built for long stays. A heat-and-cold contrast, such as a sauna paired with a plunge, adds a wellness anchor that keeps the space in use year-round. Start with layout and screening, then add sensory layers like lighting and sound once the bones of the space feel right.
How do I make my backyard feel more private and secluded?
Privacy comes from layering rather than one tall fence. Combine a solid screen on the side facing neighbors, mid-height evergreens for year-round coverage, and taller canopy trees to block second-story sightlines. Add a pergola or shade sail to close the space overhead. Plant in staggered depths so the boundary reads as a garden instead of a wall. The result feels enclosed and calm, which is exactly what a tranquil outdoor retreat needs.
How do I choose the best outdoor cold plunge for home use?
Focus on four things: insulation, drainage, placement, and how you'll fill and empty it. Insulated tubs hold temperature longer and cost less to run. Put the plunge on a level, drained surface within reach of a hose, and give yourself at least two feet of standing room on the entry side. If you're pairing it with a sauna, keep the two within a few steps of each other so the hot-to-cold transition stays comfortable.
What should I check before installing an outdoor sauna?
Confirm four things before the kit arrives: a level, drained base, the electrical service your heater needs, clearance from fences and structures, and a delivery path wide enough for the crate. Most outdoor sauna kits ship as cabins with the heater sold separately, so match the heater to the room's size and your power supply. If you have questions about site prep or heater selection, ask the seller before ordering rather than after.

Leave a comment
This site is protected by hCaptcha and the hCaptcha Privacy Policy and Terms of Service apply.